Replacement of the Fuel Line on a Husqvarna 128LD: A Step-by-Step Guide
Have you observed that your Husqvarna’s engine excessively drips or leaks fuel? If so, you ought to take a closer look at the dead fuel line. This issue and decreased fuel efficiency are typically caused by defective fuel lines. In this situation, you must completely replace the gasoline line.
Don’t worry if you are unfamiliar with the Husqvarna 128LD fuel line replacement methods. It is simple to complete. All you need to do is follow a few simple instructions and have the required tools.
So why are you late? Let’s take a step-by-step look at the procedure. This post will teach you how to avoid errors or warnings as well.
Table of Contents
Replacement of the Fuel Line for the Husqvarna 128LD: The Nine Steps
If you have a clear notion, replacing the fuel line on a Husqvarna 128LD is simple. To do the task in a professional manner, you should follow specific measures. I will thus go over step-by-step directions for doing it safely in this article.
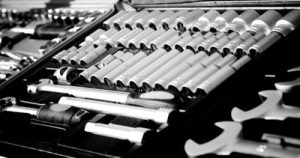
Step 1: Gather the Required Tools and Hardware
The first task is to acquire the tools and supplies needed for the work. You can’t finish changing the fuel line kit unless you get ready and gather the necessary tools. The right tools can speed up the process and reduce difficulty. Never forget to verify the model number that corresponds to your car. Keep in mind that both the online and offline markets carry all of the Husqvarna 128LD fuel line replacement kits.
Here, I’ve provided a list of some tools you should acquire before beginning the replacement process.
Step 2:Examine the state of the engine.
The second and most important step is to inspect the engine. Why does that matter? Check to see if the engine is hot or cold. Avoid touching the engine if it is too hot. Your hand will burn and suffer significant harm if you don’t. So make sure the engine is cold before moving on to the next.
Step 3: Drain The Fuel Tank
The time has come to drain the remainder of the tank’s fuel after making sure the engine is cool enough to begin operating. Fill a gas can or container with the remaining fuel so you can use it once more. It will affect the environment if you place it in an area where people live. Another thing to keep in mind is to give the surface a thorough cleaning.
Step 4: Take the wire and boot off.
Remove the wire and boot from the spark plug in this step. It is essential to avoid the engine starting unexpectedly. Disconnect any other connections to the gasoline line fittings as well. If the connector is a push-type, gently push both sides in the same direction. Then it will automatically remove itself. There is one push connector with a button that is simple to detach.
Step 5: Air Filter Cover Release
Now, turn the knob to make it easier to remove the air filter cover. Use a nut driver or 8mm socket to remove the filter. The mounting nuts for the filter housing can be removed with ease. After removing the nuts, pull the choke lever slowly to divert attention away from the housing. Screw the air filter plate and priming bulb away from the machine as well. Remember to record or make a note of the precise relationship. This implies that you should note which fuel line is linked to the priming bulb and which is appropriate for the fuel tank in order to obtain a clear and hassle-free connector for the following. Keep the nuts or screws in areas that are secure and obvious.
Step 6: Fuel line removal from the carburetor
Detach the throttle cable first, then unplug the fuel pipe leading to the carburetor. When detaching, there is a possibility of spilling. To avoid this, check the fuel lines’ alignment before removing them from the carburetor. Remove the fuel cap and retainer if the gasoline line is still not coming. Use pliers to now remove the fuel filter. After that, using a wire with a hook, remove the fuel filter and set it aside on top of the tank.
Step 7: Remove the preceding line
The older, smaller fuel line should be severed right now, near to the fuel tank. due to the wide variations in the Husqvarna 128LD fuel line size. Replace both lines if you accidentally cut a larger one rather than a smaller one. Avoid cutting the line that runs along the top of the tank.
Step 8: Insert the Line into the Tank
Push the line through the tank to remove it after trimming the hose. Take a fresh gasoline line kit for replacement after that. The new line should be cut at a 45° angle. It will be simpler to insert or feed as a result.
Cut equally and attach the new filter at some time when it is entirely at the tank’s mouth. Pull the fuel line firmly at this point to force the filter up against the tank. Then connect the carburetor to the port he pointed out.
Never leave any extra fuel lines after cutting those that are necessary. It’s required to repair the grommets while dealing with the Husqvarna weed eater 128LD fuel line replacement. The fuel line won’t be attached correctly if this doesn’t happen.
Step 9:Getting Set To Install A New One
You are finally prepared to set up the fresh line. similar to before, feed the larger fuel line. Find the ideal inserting hole. Put the remaining component with the primer. The installation you have complete once you have put each line back together. Do not comprehend? Review the steps thoroughly one more. In addition, the Husqvarna 125B fule line diagram may be useful.
In a practical sense, this video might be helpful!
Mistakes to Avoid When Replacing the Fuel Line on a Husqvarna 128LD
If everything pertaining unknown as to this, replacing this delicate kit is usually difficult. Auto owners frequently make blunders that contaminate the entire gasoline tank and line, especially novices. I’m here to discuss potential errors that could have been made and should be avoided going forward.
1. Ignore Taking Notes
This is the normal problem for newcomers. They neglect to make a note or mark the precise location of various wiring connections. Moreover, don’t press or make a strong pull. Alternatively, the fuel tank may ruined for a lifetime.
2. Become impatient
You can succeed in anything if you put in the necessary time and effort. The fuel pump, fuel line, and other components of the car are extremely fragile. So, proceed with caution and time. It requires patience to complete. However, many rush through things and end up wasting the entire gasoline tank. It is a time and financial waste.
3. Using affordable replacement kits for fuel lines
Cheap replacement for fuel might cost frequently and soon wear out. Because of this, it is preferable to get a premium PTFE fuel line (polytetrafluoroethylene). It is a plastic-based substance also known as Teflon. It maintains the line’s stability while effortlessly resisting dirt, dust, rust, and other pollutants. Don’t ever use subpar or inexpensive fuel lines.
4. Fuel Line Installation Done Inadequately
The fuel will leak if the device is improperly connected or fitted. As a result, you’ll hear a wired noise emanating from below the car or the fuel tank. Burning odors and poor fuel economy are also frequent. Fuel usage will rise however damaged your gasoline line flawless.
5. Wrong Way Of Wiring
If the fuel line is not correctly wired and installed, it will not function at all. Will you receive the desired outcomes if you connect the primer’s intended line to the carburetor? Never is it feasible. But a lot of people commit this error. First, make a note of where each person is from and where they are going.
Questions and Answers (FAQs)
How big is the gasoline line on a Husqvarna 128LD?
Usually, the approximate fuel line size of Husqvarna is 0.375” x 2.5”. Depending on the Husqvarna model, this size will change. The total length ranges from two to five feet. There are many sizes available as well. They measure 1/8 by 1/4, 1/8 by 3/16, and 0.08 by 0.14. (inner diameter x outer diameter).
Which fuel line is the priming bulb’s fuel line?
The fuel line that connects to the priming bulb must be identified in order to properly connect. The gray gasoline line basically connects to the priming line. Be cautious when matching the precise gasoline line to the precise location. The gasoline line won’t operate accurately if there is any dismissal.
Final Conclusion
To prevent the oil from spilling or leaking, it is crucial to keep the fuel line in place and functional. However, a damaged fuel line results in poor fuel economy, increased fuel consumption, etc. If this process continues, the automobile, particularly the Husqvarna, will rapidly deteriorate.
The fuel line should be examined in this situation and replaced if necessary. However, the Husqvarna 128LD fuel line replacement procedure is the issue. Many people lack the knowledge necessary to complete it effectively and safely. This article is structured with a helpful guide and some errors with them in mind.