How To Fix A Scotts Broadcast Spreader? [A Complete Guide]

As per our research, most of the users don’t have the proper knowledge about how to fix a Scotts broadcast spreader properly. As a result, they have a tendency to bungle when fixing any part of their Scotts broadcast spreader. However, it is not difficult to fix your Scotts broadcast spreader.
In this article, we will explain the different types of fixing for your Scotts broadcast spreader. The users of Scotts spreader will greatly benefit from this article. So, don’t go anywhere without finishing it.
Table of Contents
How To Fix A Scotts Broadcast Spreader? (The Best Way)
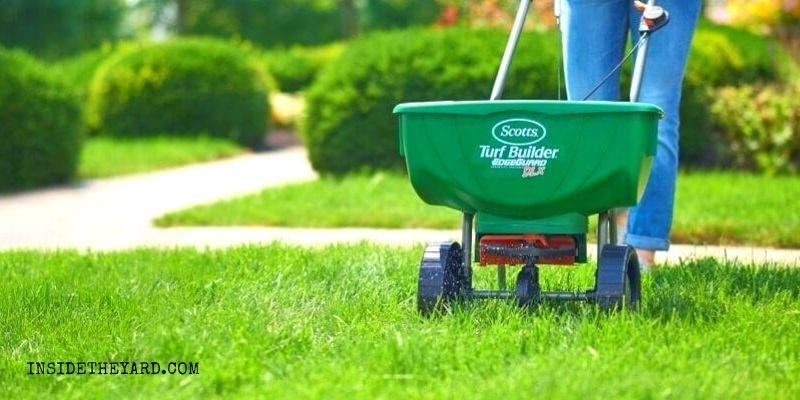
To fix your Scotts broadcast spreader, first, you have to diagnose the issue. Then take proper steps to fix it in the right way. In this section of the article, we will explain how to fix the Scotts pro edgeguard broadcast spreader parts within a very short time:
Fix 1: Scotts Spreader Wheel Fix
Sometimes your spreader won’t turn, and it stops functioning. This is because the Scott spreader wheel stuck. Try rolling the wheel first, and if it doesn’t spin, then take these off. Squeeze gently to remove the wheels.
The wheel usually gets stuck, or at least one of the mechanisms is supposed to grab on.
However, twist this thing because when you do that, it starts to turn. Then drill a hole and place a pin or something so that when the thing turns, it takes the pin with it.
Now we are going to drill another hole through the whole thing. We should drill this long. That takes the axle and turns everything. Go ahead, and spin the two wheels until the traction is fully all right.
Fix 2: Fixing A Locked Up Scotts Broadcast Spreader
You may accidentally lock your Scotts drop or broadcast spreader. But you have to unlock it before using it. Here’s how to unlock it:
Fix 3: Find The Right Setting For The Scotts Broadcast Spreader
Spreader settings are usually set to a low setting of one-fourth of the complete spreader settings range. Cover an area of 1,000 square feet with the material spread over a 50 x 20-foot area.
You need to increase your setting if you have extra material. Reduce your setting if you don’t have enough.
Fix 4: Maintenance Guide For Your Scotts Broadcast Spreader
Before each use, the first thing you should do is thoroughly inspect your Scotts broadcast spreader for loose bolts, nuts, or other parts. If you find any, tighten them immediately. Then look for worn or damaged parts and replace or repair them as necessary.
Check that the tires are properly inflated and don’t over-inflate them beyond the maximum recommended pressure printed on the side of the tire.
For prolonged and reliable use, you lubricate the tires regularly. Start each season by giving the sprocket and gear a light coating of automotive grease.
Apply oil to the nylon bushings on the vertical sprocket shaft on the axle and the right-hand idler wheel bearing at least once a year or more often if you use your Scotts spreader more frequently.
Be sure to rinse the inside of the hopper and the exterior of the spreader. Clean and dry it off before storing.
When in doubt, check and follow the instructions in your owner’s manual.
How Do You Calibrate A Scotts Broadcast Spreader? (The Easiest Way)
The spreader conditions may affect material flow after a certain period. In order to continue successfully using a spreader, it is necessary to calibrate its output over a specific area.
However, the following 5 steps will help you to calibrate your fertilizer spreader Scotts:
Step 1: Tools Needed for Calibration
The following things will require to calibrate a Scotts broadcast spreader
After gathering these tools mentioned above, we can now move forward to the practical steps.
Step 2: Determine The Requiring Fertilizer
In this step, determine how much fertilizer is needed to cover a 1,00 square foot area.
Make sure that you are applying the proper amount of fertilizer effectively and efficiently.
Because it’s important to calibrate your Scotts spreaders. Generally, this information is available on the backside of the manufacturer’s bag.
Since fertilizer granules can vary in size, it’s also essential to perform this calibration using the actual fertilizer that you plan to spread. Use a scale for accurate calibration and measurement of the output.
Anyway, once you have determined what kind and how much fertilizer your lawn requires by conducting a soil test, you should then work on getting those nutrients into the soil.
Step 3: Measure The Effective Swath Width Of The Spreader
Scotts broadcast spreaders are wheel-driven, so variations in walking speed will affect the spread of your application. People who walk faster will have a wider swath than those who walk slower. Keep in mind that you need to maintain a consistent speed.
Add enough fertilizer to the spreader hopper to allow you to cover the area. Set the spreader to the middle setting and start spreading at your normal walking speed.
You will only need to walk a short distance for this part of the calibration. After that, you will be able to see a consistent swath on the ground. Now, measure the effective width of the swath and make a note of that result.
The effective width is the area between the two points where the fertilizer begins to thin out in the pattern. When you eventually spread the material the thin areas on each side of the swath should overlap as you make each pass. This will help prevent the striping that can occur when done incorrectly.
Step 4: Determine The Length Of The Run
Since we want to figure out how much fertilizer is needed to cover 1000 square feet, the next job is to determine the length of the run. In our case, we have a 10-foot swath, so we require a 100 foot run to equal 1000 square feet.
After that, you need to measure and mark your land area’s start and finish lines, then prepare your Scotts spreader. Weigh out a few pounds of fertilizer using your bucket and scale. Note the weight of the bucket and subtract it from your total.
Step 5: Finish The Job
With your spreader still on the middle setting, begin your run across the area that you marked off earlier. Be sure to give yourself enough space to get up to speed before you reach the starting line.
Once you hit that line, open up the hopper and continue at a consistent pace. Don’t forget to close the hopper as you cross the finish line. To determine how much material was distributed, weigh the remaining fertilizer in the hopper, then subtract the total from the original amount.
Compare it with the manufacturer’s suggested output. If your weight is higher or lower, then adjust your spreader’s output and retest until you reach the desired application rate.
That’s it. Now that your Scotts broadcast spreader calibration is successfully done.
How Do You Fix A Broken Spreader? (3 Simple Steps)
Here I am going to show you how to fix a broken spreader when it is not working. This usually happens in the middle of winter.
However, to fix broken Scotts spreaders you need to follow these 3 steps:
Step 1: Take The Cashing Off
First, take the casing off. The mechanical design of most spreaders is the same, so you can easily fix any broken one following our instructions.
Step 2: Find Out What Is The Issue
You will find a little clip there. Just spin it to see what happens with that. In most cases, the little clip is broken off. And you need to replace it with a new clip.
Step 3: Fix Your Broken Spreader
Replace the clip by opening it up and only putting one of the prongs through. After that, wrap it around. Make sure that you put the entire clip through and then flip out the ends. As a result, the clip will be long-lasting.
How To Repair A Scotts Rotary Spreader? (4 Steps To Fix)
Follow these 4 steps to strip down your Scotts EasyGreen Rotary spreader for servicing and replace any worn parts:
Step 1: Replace The Cable
Remove the micrometer from the Scotts rotary spreader mechanism. On the hopper and from the housing is the control lever for turning on and off. At this point, you can replace the cable. You should always recalibrate the spreader after replacing the cable.
Step 2: Remove The Agitator
Now we are going to remove the wheels and release the spreading mechanism. Flip off the orange hubcaps and pull out the retaining axle plugs. Slide the axle out from the free side, from left to right.
With facing the back of the hopper, the gearbox and the spreader plate are now released. You can access the agitator, the control gate, and the spring through it.
Now, we can remove the agitator.
The agitator is a component that spins around the bottom of the hopper, to feed the granules into a spreading plate.
You can push up the agitator through the base of the hopper and then remove it.
Step 3: Fixing The Tensioning Device
The tensioning shut-off plate acts like a spring, and it’s easy to remove for cleaning. Release the arms of the spinning and lift off the tensioning device. Both parts can be released for cleaning.
Once clean and dry, the tensioning device can be replaced by simply reversing the process. Placing the spring arms onto the hopper rest.
Step 4: Remove The Hopper
First, remove the nuts and bolts that attach the hopper to the handle. All parts are now free to be cleaned and lubricated. You can replace any of these parts if needed. Regularly lubricate your axle bushings with a light spray lubricant.
The above steps will assist you in repairing a Scotts rotary spreader. Just reverse the steps to assemble it again.
How Do You Adjust A Broadcast Spreader?
Set your broadcast spreader to get a base starting point, but always keep in mind that suggested settings are only starting points.
Depending on the spreader’s age and condition, calibration of each product is the only way to ensure proper distribution.
When you are ready, back up about 10 feet behind the starting point, you marked and started walking towards the starting point.
Just as your wheel passes over the starting point, push the lever down securely in the spreader hopper to fully open the gate.
This Video Will Help You Too!
Final Verdict
After reading our article, we are confident that you won’t have any confusion about how to fix a Scotts broadcast spreader.
But you can still communicate with us if you have any article-related queries.


