How to Change PTO Belt on Grasshopper- Easy Way

How to change PTO belts on grasshoppers? You need a few tools and some steps to follow carefully.
You see, it takes a lot of work for the upkeep of the lawn. There is some equipment needed and let’s not forget, maintenance of that equipment.
In this article, we will make you engage talking about the replacement process of PTO belts on grasshoppers. If you know how to change, replace and install a PTO belt, the whole process of maintenance of the lawn or yard becomes a lot easier.
Table of Contents
How to Change PTO Belt on Grasshopper?
Let’s commence the process of changing the PTO belt in the grasshopper step by step.
Before you start the process, there are a few things that you need to check.
Equipment You Need
Make sure to have all the right equipment for changing the PTO belt. Here we have mentioned some of the supplies you will need.
Positioning the Mower
Position the mower vertically as you are going to work on the lower part. This gives you a better standing point.
Opening Mower Deck
Open the mower deck completely. This is the place where all the operations take place.
Remove the Spoilt Belt
Remove the previous PTO belt to start working on the replacement. You will need to dismantle the machine to remove the Spoilt Belt.
Just take off the mower deck and see how the belt is set up. You will have access to the belt after you have taken out the pins. Then just take out the belt. You can also follow the instruction manual.
Now, reinstalling time for the new belt. However, we have discussed two methods in the process of changing the PTO belt.
Remove the idlers
The first step is taking off the idlers. You will spot the idlers behind the mower, positioned towards your left. To remove the idlers, take a crowbar.
Hold the idlers using the crowbar in the upper level. Then with the help of a spring, take the idlers off.
Adjust the PTO Belt
The second step involves adjustment of the PTO belt. When the idlers are off, round up the belt around the pulley. Now that the idlers are removed, you can take all the time you need to adjust and readjust the belt.
Remove the covers
In the next step, you need to take off the idler and belt’s cover. Keep it back at the last step of the work.
Place the Bolt
After patching the belt, move to the bolt. Take a bracket and change the belt keeping your grip on the belt.
An alternative way to install the new PTO belt on the Grasshopper
Attach the PTO belt
Take a socket wrench. This will help you to fit the belt in the spindle nut. Attach the belt using the spindle.
Tuck the PTO belt
Hold the belt on the puller and make sure the belt fits in the pulley correctly. Try to hold the belt with your left hand while running on the right side. This technique ensures a better grip.
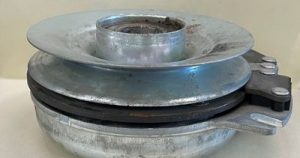
What is a PTO Belt?
Before we go on to the process, we should know what the PTO belt is. PTO belt or Power take-off belt operates the blades in the engine. The belt is one of the parts of the pulley system that works behind the operation. There is an electric clutch system in the engine. The PTO belt runs off the system. The mismanagement in changing the belts can wreck the whole system.
Several indicators indicate that it is time to change the PTO belt on the Grasshopper. But most newbie often finds it difficult to understand those indicators. We have discussed some indicators below –
then the PTO belt needs changing.
A Helpful Tutorial You May Need!
Frequently Asked Questions (FAQs)
Do zero turns have a drive belt?
Yes, the zero turns have a drive belt. You need to replace them for around after 100 hours of use.
How do I know if my mower belt is bad?
If the sidewall of the belt has been damaged, the sidewall of the belt is burnt, there are cracks on the belt, then you will know the mower belt needs replacement.
How to replace the belt on the Grasshopper 220 deck diagram?
Get hold of the belt on the pulley as tight as possible. Then turn your belt while holding onto the pulley. Starting at the rear, feed the belt over the clutch and after taking off the idler, route your belt around the shives. Place the idler on the belt.
Conclusion
The instructions mentioned above on how to change the PTO belt of Grasshopper is more or less applicable to all model. Nevertheless, there might be some changes according to the model, but they are not that significant.
Make sure to always go through the manual before changing the belt. In the end, restart the device for a test run, and you are all set.