[Fixed] John Deere 100 Series Transmission Problems

Can you fix John Deere 100 series transmission problems that are very common? Yes, it’s pretty easy to fix the transmission system by getting access to it and replacing the parts.
Almost none of them can fix it themselves. Due to this, they had to spend a lot on the tractor workshop. However, in this article, we are going to provide DIY solutions for the hydrostatic transmission lawn mower. So, don’t go anywhere without finishing this article.
Table of Contents
Fix John Deere 100 Series Transmission Problems: In Simple 8 Steps
Transmission problems cause various issues like bad clutch, leaking, low transmission fluid, and many more. If you have a John Deere 100 series lawn mower, then you might be familiar with transmission problems.
That’s why in this article, we provide complete instructions on how to fix John Deere 100 series transmission problems. Follow these simple 8 steps to solve transmission problems on your own:
Step 1: Gathers All The Required Tools
Before starting the practical steps, you have to make sure that you gathered all the necessary tools to fix the hydrostatic transmission problems of John Deere. A 10-mm wrench, a drill bit, piler, and a pair of gloves will be required to complete this task. Keep a hammer and screwdriver nearby in case you need them.
Step 2: Pull Your Wheel Off
Now, it’s time to pull your wheel off with the tools that you have already gathered. For that, at first, you have to grab the cap to pop it off. Then take a flat screwdriver and put it in the ‘C-clip.’
Just turn it down until it pops out. Get in the middle and then pry down the ‘C-clip.’ After that, you will find two washers there. Untie them to pull your wheel off.
Step 3: Remove The Washer
As you pull your wheel off, listen for a key to fall. This is a woodruff key, and it’s a great oversized one. So, make sure not to lose this key.
Anyway, use the woodruff key in the shaft’s slot. Then you will see a washer, a barrel, and another washer. Set all of this aside and move forward to the next step.
Step 4: Straighten The Cotter Pin
Put the wheels underneath the little deck thing. For extra protection, put the jack underneath the lower case of it. You will get a pair of needle-nose pliers and see that the break paddle connects it.
You just need to straighten the cotter pin. A parricide cut usually works pretty well for this. However, pry it back and set it on the side. Here we have a 10-mm socket and use a drill bit to pull this one. Then put it with the cotter pin.
Step 5: Get Access To The Belt Guard
After that, we need to move to the other side. The belt guard will be accessible there, so you need a 10-mm wrench. And on the top, you will see a bolt. Just pull that out, and set it aside.
There is a washer that goes with this bolt too. You can now easily lift the belt guard. The belt tension is pulled up on the right-hand side of your John Deere 100 series tractor. You will find another 10-mm socket, pull this one too and keep it aside.
Also Read: John Deere Not Getting Fuel! Continue Reading For Amazing Solutions
Step 6: Pull The Belt Tensioner
You can now see the belt tensioner on this right side with some spring tension. Pull the tension back and unloop it from the top pulley. You may get some wires hanging down there. Those wires are generated for your reverse stop.
However, the belt tensioner looks cluttered and chaotic, but it’s not a big deal. Pull from the right-hand side to loop it around. You will also get a little nope neutral on the backside of the John Deere 100 series tractor.
We drilled out, so it’s just easy with one of the pins. You can do that with a new drill piece too.
Step 7: Remove The Transmission
Now, we are going to push that neutral up. Then we will set it on the mower deck. Here you will get a little switch thing. Go ahead and pull that off. After that, you will find a clip or a pin or something on the inside and the board side. Just be aware of that and switch gears.
However, pull this 13-mm and the bolts. Now your transmission should be easy to remove. But you need to be careful because the weight of the transmission is a little bit hefty.
Step 8: Fix the 100 Series Transmission Issue
Is your neutral daunting not engaging when you stick it in neutral? If so, this indicates that your John Deere 100 Series transmission is not working correctly.
Let me tell you how to fix the 100 series transmission problems. Here are some easy ways to fix different transmission problems for John Deere 100 series lawn mowers:
Also Read: John Deere Hydrostatic Transmission Problems
Way 1: Engage Your Neutral
This simple trick is very much effective in fixing minor transmission problems of 100 series JohnDeere.
In this method, you don’t require removing the transmission entirely from its position. Just need to get access to the belt guard. Simply move the belt up and down a couple of times.
Then it should engage the neutral because sometimes this gets finicky and does not want to work right. As a result, the transmission won’t engage correctly.
Way 2: Fix Your John Deere Hydrostatic Transmission Problems
Take the example where you are mowing grass with your John Deere, and everything is going smoothly.
You Mow for a while, and then suddenly it stops moving due to hydrostatic transmission problems with John Deere’s. In that situation, you need to follow the following steps:
Step 1: Shut off the mower and put on the parking brake. Put on gloves from your toolbox to avoid burning yourself.
Step 2: Then lower your deck so you can see the transmission drive belt. Make sure it is on all of the pulleys. There should be slack in the belt if the parking brake is engaged. It will only be tight when you let off the paddle.
Step 3: Look for sticks or other debris because they are the number one cause of loss of drive. If you see debris, clear it out and make sure to reinstall it. Once this is completed, John Deere’s hydrostatic transmission problems will be solved, allowing your lawn mower to move again.
Similarly, if you do not find any debris and the belt is in place, your pulley may be turning, but the input shaft may not be. In that case, spend a few dollars to change or repair the damaged parts.
Way 3- Rebuild Or Replace The Transmission
You will need to rebuild or replace the transmission part if the transmission is too damaged. In that case, first of all, remove the transmission properly by following our above guidelines. After removal, try to find out what’s going wrong.
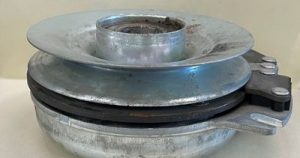
Drive pulley, input pulley, vent cap, filler cap, and drain cap are the major parts of the John Deere 100 series transmission. You can change or rebuild any of these parts if they are damaged. In situations where several parts are damaged, it is better to replace the whole transmission.
This Video Will Help You Too
Frequently Asked Questions (FAQs)
How Do You Know If Your Lawn Mower Transmission Is Bad?
Observe your lawn mower transmission during engine operation to determine the transmission’s condition. The transmission is bad if the pulley spins but the wheels don’t move. This part is not usually replaceable, so you may have to purchase a new mower if it breaks.
How Do You Adjust A John Deere Hydrostatic Transmission?
Take a wrench and loosen the nylock nut. Turn the concentric or eccentric nut, then forward or backward until your creep stops. Then adjust for the center part. Once you have no more creep, you will tighten up your nylock or jam nut whatever you have got there. And that should stop your creep.
However, constantly adjust a John Deere hydrostatic transmission for all speeds. If it starts creeping again, follow the same method to loosen the jam nut.
What Transmission Is In The John Deere S130?
John Deere S130s come with a hydrostatic transmission.
Last Few Words
After reading our article, we hope you can fix all kinds of John Deere 100 series transmission problems yourself. If you still have questions and queries about this, please don’t hesitate to contact us.