Engine Starting Issue: Riding Mower Turns Over But Won’t Start
The engine on the lawnmower seems like it’s going to start when you turn the key, but it doesn’t. This is probably due to a lack of ignition factors like air, gasoline, a spark, or compression.
When a riding mower cranks but won’t start, it could be due to a number of issues, including a clogged air filter, the improper choke setting, a dirty carburetor, a faulty fuel pump, a stopped fuel filter, or a faulty spark plug. It’s also possible that the gas is simply old.
 Before diagnosing, repairing, or operating, be sure you’ve read and understood all of the safety recommendations in the equipment’s operator’s manual. If you lack the expertise, experience, or physical ability to complete the repair safely, you should seek the advice of a professional.
Table of Contents
Engine Cranks But Riding Mower Won’t Start
Blocked Ventilation System
Let’s begin our investigation by eliminating potential sources of airflow obstruction. Air filters are the first thing on the list.
To prevent engine damage from dust and debris entering the engine’s air intake, a filter is necessary. Even a small amount of dirt or debris can damage the engine and reduce its useful life.
Mowing kicks up a lot of dust and grass clippings, so it’s important to use an air filter. It must be cleaned frequently and replaced when broken or worn.
If a filter becomes clogged, less air will be able to pass through it. If your engine is deprived of air, it will not start.
Each new mowing season should begin with a clean air filter, and that filter should be cleaned multiple times during the season. Before starting your riding mower, you should inspect the air filter to make sure it is in good working order.
If your engine has a pre-cleaner made of foam, you can clean it by following the steps below. If your vehicle requires a special filter, please see your handbook.
Cleanse a Riding Mower Paper Air Filter
- Take off the air filter from its housing. Take care that dust doesn’t get sucked into the fan.
- To remove any remaining dust or debris from the air filter housing, use a clean, dry towel.
- To remove as much dust and debris as possible from a paper air filter, tap it against a hard surface.
- You can test the transparency of your paper filter by holding it up to a light and seeing the effect.
- When light is visible again, reuse the filter.
- If there is no light coming through, the filter is excessively dirty, or it is damaged, you should get a new one.
- Replace the air filter cover and reconnect it. (If your mower has a foam pre-filter, follow the cleaning and installation steps below before securing the filter cover).
Clean a Riding Mower Foam Pre-Filter
A pre-filter or a foam pre-filter is not standard equipment for all engines. Be sure you’re not confusing this with a standard foam filter. A foam pre-filter is an additional filter installed before the primary paper air filter. Never put oil in a pre-filter; it will ruin the paper inside.
- Examine the filter’s pre-stage. If you detect any tears or if it becomes brittle, throw it away and get a new one.
- Clean the foam filter by washing it in warm water with a drop or two of mild dish soap.
- Remove all traces of soap and rinse well with water.
- Spread out flat and let air dry. The drying process can be sped up by leaving the filter outside in the sun.
- When the foam pre-filter and the paper primary filter are dry, reinstall them together and replace the filter cover.
The Choke Position Affects the Starting Procedure
Your mower will include a choke lever or knob that you can use to activate the choke. This component allows the user to regulate the air-to-fuel ratio by opening and closing a plate.
To start a cold engine, you need to use a rich fuel combination that is heavy on the gas and light on the air. Choke on will close the plate and restrict airflow, so set it there.
The choke lever needs to be moved to the off position once the engine has warmed up to allow it to receive more air and keep running. Turn off the choke before trying to start the engine if it has warmed up.
An incorrect placement of the choke lever can make starting your riding mower difficult, if not impossible. Check the choke position and adjust as necessary.
If the airflow is still poor after adjusting the choke, make sure the plate is not jammed and the cable may move freely. If the choke plate or links are jammed, use carburetor cleaning to loosen them.
If the choke wire has worn out to the point that it cannot be adjusted, you may need to replace it.
Spark Plug Failure
The spark plug is our next stop. If you are using a two-cylinder engine on your riding mower, you may have one or two spark plugs.
A 3/4-inch or 5/8-inch socket wrench can be used to remove a plug. The type of engine you have will determine the minimum acceptable size. Check out the end of the plug that goes into the gun.
Intermittent or no spark can be the result of a dirty or broken spark plug. The engine cannot be started and run without the spark plug.
Bad spark plug symptoms include a darkened, soot-covered tip, a wet spark plug, or cracked porcelain. Replace the spark plug if you notice any of these issues.
If you discover a soaked plug, you should investigate the source of the leak before attempting any repairs.
A plug that is otherwise functional but slightly unclean may be cleaned using this method. To get rid of the carbon accumulation, you might use a little wire brush.
After checking the electrode gap and making sure it is appropriate, replace the spark plug. The spark plug wire must then be attached tightly.
New spark plugs should be installed at the beginning of each season because they are so important to the lawn mower’s performance.
If the spark plug is fine, you should inspect the wire connecting it to the engine. Verify that it has not dried out to the point of cracking. Because of this, it can crash to the ground.
Examine the ignition coil after that. If this doesn’t work, you won’t be able to generate enough energy to start a fire.
Low Fuel or Old Fuel
Low fuel or contaminated fuel are two possible causes of your riding lawn mower’s inability to start.
In case you didn’t know, gas goes bad after a while. Today’s fuel, with ethanol added, deteriorates rapidly. Because of this, fuel should be used within 30 days of purchase, as advised by engine makers.
Fuel constraints and component failures are both exacerbated by the varnish and sticky deposits left behind by old gas.
Always buy fresh gasoline and use it up within a month to keep your riding mower running smoothly. Avoid using ethanol-rich gasoline.
Fuel with an octane rating of 87 or above and no more than 10% ethanol should be used.
The solution is to use a fuel siphon pump to empty the tank if stale gas is detected.
In order to clean the gasoline system and eliminate moisture, fill the tank with new fuel and add a fuel stabilizer, such as Sea Foam. The advantages of Sea Foam are discussed in greater detail here.
If your mower starts up, let it run for a few minutes so the gas and fuel additive can circulate.
If you still can’t get it started, keep reading to learn how to check additional fuel-related components that could be to blame.
Fuel Filter for Riding Mower is Clogged
If your mower isn’t getting fuel, check for other problems, such as a clogged fuel filter.
Your riding lawn mower’s fuel system has an inline fuel filter, situated somewhere along the fuel lines. To prevent debris from clogging the fuel system and damaging the engine, the filter is used to clean fuel before it is delivered to the engine.
If the filter isn’t changed frequently enough, it can become clogged. As a result, the lawnmower may turn over but fail to start because fuel cannot flow freely through the filter.
If your fuel filter is old or clogged, you should get a new one.
Fuel Line Blockage
The next step is to locate the carburetor by tracing the fuel line from the tank. If the lawnmower’s engine turns over but doesn’t start, check for fuel flow restrictions.
Check for a gasoline limitation in the fuel line if you don’t discover any kinks. Start by turning off the fuel supply with the valve or pinching off the supply with pliers.
After turning on the gasoline supply, remove the end of the line farthest from the tank and place it in a container to ensure adequate flow through the rest of the line.
If fuel is not flowing via a fuel line, disconnect it from the lawn tractor and turn off the fuel source.
Put some carburetor cleaner in the line and spray it. This is done in an effort to break up the obstruction. After that, use compressed air to blow through the line and dislodge the obstruction.
It may take multiple attempts with the carburetor cleaner and compressed air to clear the obstruction.
After the obstruction is cleared from the fuel line, reinstall it. If the restriction cannot be removed or if the gasoline line is old and showing signs of cracking, you should replace it.
Bad Fuel Pump on Lawnmower
Your riding mower can have a gasoline pump. Don’t panic if you can’t find a pump on your mower; they’re not standard equipment.
When the carburetor is located above the gasoline tank, a pump is required to transfer the gas. This pump defies gravity by transporting fuel uphill.
The fuel pumps that do exist are typically of the vacuum variety. The fuel is pumped using the crankcase’s suction.
The gasoline pump must be replaced if it develops cracks or stops functioning properly. If there are no obvious signs of damage, such as cracks or gasoline leaks, you can still assess the fuel pump’s health.
First, make sure gasoline is entering the pump through the inlet port. (If you aren’t, perhaps the fuel filter or line is clogged.)
Once fuel flow to the pump has been established, the fuel line can be disconnected from the carburetor and saved for later use. Start the gasoline flow and the mower to make sure the pump is working properly.
The fuel flow from the fuel line should be consistent or pulsing. If you don’t, the gasoline pump will eventually die.
Unclean Riding Lawnmower Carburetor
The carburetor is a part of the engine that mixes fuel and air for combustion. Without a properly functioning carburetor, your lawn mower will crank but refuse to start.
When a carburetor stops working, old gas is usually at blame. Varnish left behind by old gas can clog the fuel jet and cause internal parts to stick.
When the carburetor fails to function, the solution is to either clean it, replace the broken pieces, or get a new one.
The following must be done before the carburetor can be disassembled:
- Make sure the carburetor is getting sufficient fuel.
- Get rid of the air filter.
- The mower won’t start unless you spray carburetor cleaning into the air intake. If it starts up and uses the carburetor cleaner, but then stalls or dies after the cleaner is gone, you probably have a dirty carburetor. Disassemble the carburetor and clean it or get a new one, but don’t use starter fluid. Carburetor maintenance is covered in further depth here.
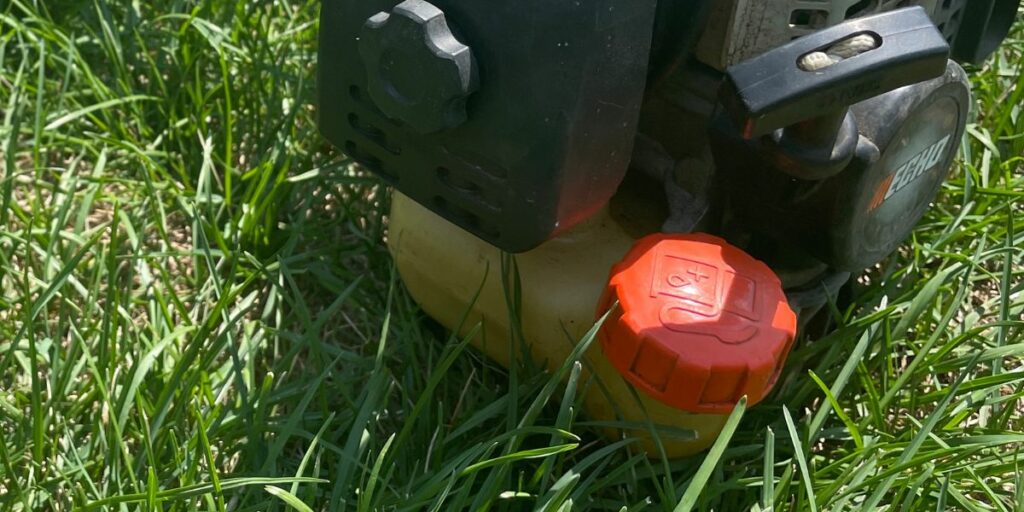
Clogged Gas Cap On Lawnmower
Venting the fuel tank allows the pressure inside the tank to become uniform with the outside air pressure. The gas cap of a lawnmower serves as the vent.
If the cap’s vent becomes blocked, no air can escape the gasoline tank, creating a vacuum.
The absence of air prevents fuel from reaching the carburetor. The lawnmower will crank, but it won’t start since there’s no gas.
When your mower has been running for a long, shut off, and won’t start again, this is a common issue.
Try starting the lawnmower with the gas cap loosened to see if that solves the problem. It could be the gas cap if it starts.
Let the mower run as you tighten the cap to be sure that’s the issue. In the event that it sputters, shuts down, and refuses to restart unless the cap is loosened.
The solution is to get a new gas cap if the old one is broken or clogged.
Inadequate Compression in the Engine
Once you’ve established that the engine is receiving gasoline, air, and spark, you can inspect it. To ensure the engine has compression and that the valves, piston rings, and other internal components are in good working order, a leak-down test or compression check can be performed.
You’ll need the appropriate readouts and engine specs. In many smaller engines, the compression is automatically released. These engines perform better on a leak-down test.
If you need diagnostics or repairs for your mower’s engine, I suggest taking it to a local small engine mechanic who is trained by the manufacturer.
Additional Support for Your Riding Mower Issues
If you keep a riding mower for a significant amount of time, you’re bound to run into some issues. As a result, I have compiled a list of typical issues, along with relevant resources for further investigation.