Diagnose and Fix 13 Common Problems with Makita Leaf Blower
Failure to provide adequate air, fuel, and spark can prevent starting of a Makita leaf blower.
The fuel, the fuel filter, the fuel line, the primer bulb, the carburetor, the fuel tank vent, the air filter, the spark arrestor, the spark plug, or the recoil starter could all be at fault.
If you want to know why your Makita leaf blower won’t turn on, read on! It may be as easy as water getting into the engine.
Before attempting any repairs, such as disconnecting the spark plug wire, ensure that the vehicle is in a safe environment.
When troubleshooting, repairing, or using a piece of equipment, be sure to first read and follow any safety recommendations found in the manual. If you don’t feel confident in your ability to conduct the repair safely due to a lack of experience, training, or health, it’s best to call in an expert.
Table of Contents
This Is Why Your Makita Blower Won’t Start
It’s a good idea to start with replacing the maintenance items if you haven’t done so in a while. Filters for air and gasoline and a spark plug are all included.
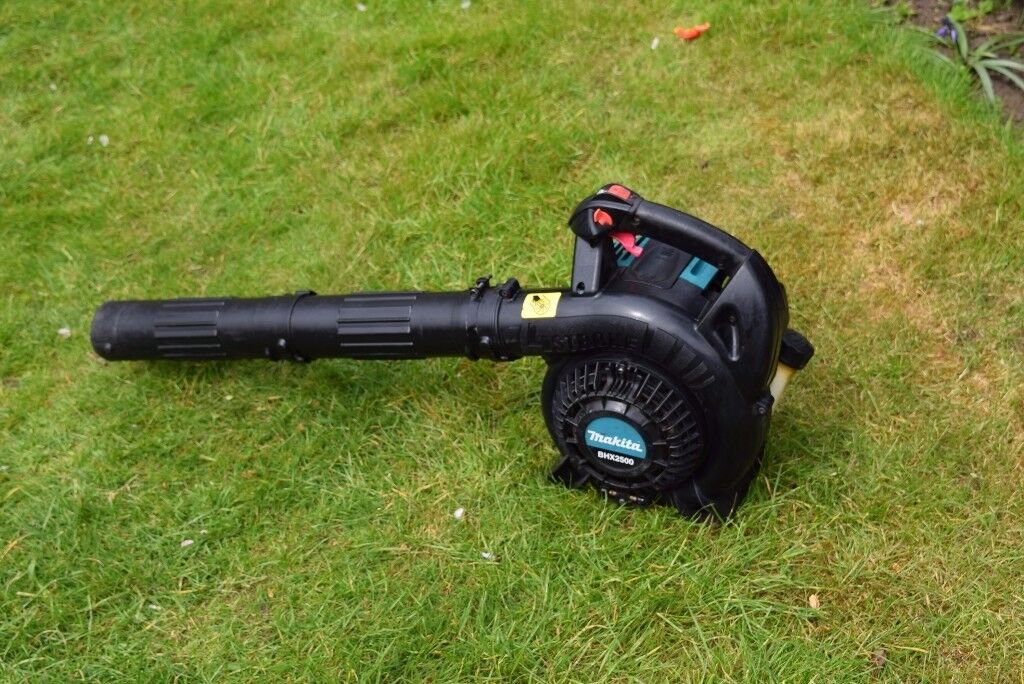
A Makita Leaf Blower with an Air Filter Attachment
The air filter is essential for optimal performance and cleanliness of the engine of a Makita leaf blower.
Using a leaf blower can make the air quite dusty. When the air filter becomes clogged with dust, it restricts the flow of air and causes a problem. If there isn’t enough air, your blower won’t turn on.
Your leaf blower cannot function without an air filter. Never use the fan without a guard. If you let dirt and debris sit on the engine, it will eventually wear down and cause harm.
REMEDY: Switch out the unclean air filter.
- Take the air filter out of its housing.
- Remove any lingering grime from the air filter housing by wiping it down. Avoid having any debris land in the air intake.
- If the filter is unclean, you should get a new one.
- Put in place the filter cover and air filter.
Air filters should be changed once a year at least. Upkeep doesn’t end there. You should inspect the filter and clean or replace it as needed throughout the year.
Broken Makita Leaf Blower Spark Plug
whether your leaf blower won’t start, check the spark plug to see whether it’s filthy or broken. Oil and carbon buildup, a charred electrode, or cracked porcelain all indicate the need for a new plug.
A filthy spark plug could be at blame if you manage to get your mower started, but it continues to run slowly. The engine may misfire if the spark plug is filthy.
FIX: The spark plug has to be cleaned or replaced.
- Clean the area around the spark plug.
- To take out the spark plug, you’ll need a socket wrench.
- Check the condition of the spark plugs.
- If the spark plug appears damaged, worn, or extremely dusty and dark, it should be replaced.
- If the spark plug is otherwise in good shape despite some dirt, you can try cleaning it with a wire brush and reusing it.
- Use a feeler gauge or spark plug gap instrument to examine the gap between the spark plugs. Most Makita leaf blowers have a recommended gap size of 0.024′′–0.028′′ (0.6 mm–0.7 mm). Please refer to the handbook for use.
- Replace or clean the spark plug and install it.
- After you’ve finished making any necessary repairs, you should connect the spark plug wire securely.
Your car may not start because of a loose wire or a faulty plug with an improper electrode spacing.
Makita Leaf Blower with Clogged Fuel Filter
The function of the fuel filter is similar to that of the air filter in that it prevents debris from contaminating the fuel supply.
Filter clogging is possible if filthy gasoline is used or if the filter is not changed regularly. If the filter on your Makita leaf blower is clogged, the engine won’t start because it won’t get enough fuel.
This is another component of your vehicle that has to be serviced annually, or more frequently if you have been using dirty fuel.
REMEDY: Get a new fuel filter.
- Loose dirt and debris should be wiped away from the area around the fuel cap.
- Disconnect the fuel cap.
- You’ll find the fuel filter within the tank.
- Make sure the replacement filter goes in the same spot in the tank by marking its current location.
- To remove the filter from the tank, use a clean metal wire or a pair of needle-nose pliers.
- Take out the worn-out filter.
- Get a fresh filter and put it on the line.
- Bring the filter into the tank and set it up.
- Put the gasoline cap back on.
Misusing a 2-Cycle Makita Leaf Blower with the Wrong Oil
If you try to run straight gas through a 2-cycle leaf blower’s engine, it will seize and stop working.
A 2-cycle engine needs the lubrication that comes from a mixture of gas and oil, which is absent from pure gas. Using straight gas will quickly destroy your leaf blower’s performance.
A 50:1 mixture of gas and oil is recommended for the 2-cycle engine found in Makita leaf blowers. Blending 50 parts gasoline with 1 component oil is called a 50:1 mix.
To make this blend, you should use unleaded gasoline with an octane rating of 89 or higher (mid-grade) and no more than 10% ethanol.
Put in some ISO-L-EGD and JASO M345 FD approved 2-cycle premium oil. Before putting it to your leaf blower, mix it in a gas can that meets safety standards.
The answer is to empty the gasoline tank and refill the 2-cycle Makita leaf blower with new fuel
- Loose dirt and debris should be wiped away from the area around the fuel tank cover.
- Disconnect the fuel cap.
- Remove used fuel and place it in a safe container.
- Combine 50 parts gas to 1 part oil in a separate fuel container.
- Replace the gasoline top and give the container a few gentle shakes to ensure a thorough blending of the contents.
- Replace the old fuel with the new fuel.
- Fix the loose fuel cap.
If the problem persists, take it to a small engine mechanic so they can assess whether or not it can be fixed affordably.
Makita Leaf Blower 2-Cycle Premixed Fuel
Using an ethanol-free gasoline blend is a wonderful way to lessen fuel-related issues and maximize engine longevity. This oil and gasoline combination has no ethanol and is ready to be used in your leaf blower.
You won’t have to worry about ethanol’s drawbacks, as mentioned above in the fuel section. In addition, having fuel on hand is a huge time saver. The 50:1 premixed fuel produced by TruFuel is excellent.
Makita 2-Cycle Gas/Oil Blend for Leaf Blowers
| Mixture | 1 Gal | 2 Gal | 2.5 Gal |
|---|---|---|---|
| 50:1 | 2.6 oz | 5.2 oz | 6.4 oz |
Insufficient Makita 4-Cycle Leaf Blower Engine Oil
The first rule of using a Makita 4-cycle leaf blower is to never combine oil and gas. A 4-cycle leaf blower’s fuel and oil may be refilled separately.
There is a fuel filling hole and an oil filling hole. You should never run a 4-cycle blower on 2-cycle oil. Oil for engines is most effective when cooled by air.
To prevent wear and tear on the engine, SAE 10W-30 engine oil should be used. Using the incorrect kind of oil or not enough oil can cause the engine to overheat, prevent the leaf blower from starting, and perhaps destroy the engine.
FIX: Make sure you’re not out of oil or using the wrong kind of oil by checking the level.
It’s important to remember that you may need to alter the leaf blower’s viscosity if you’re using it in extremely cold or extremely hot circumstances.
Makita blower engine oil level check
- Set the fan up on a flat, even surface.
- Remove any dust or debris from the area around the oil cover by wiping it clean.
- Take off the oil fill cap.
- The ideal level of engine oil in the tank is halfway between the maximum and minimum markings.
- If the blower is running low on oil, fill it up. You shouldn’t cram too much in there.
- Get a new gas cap.
Change the oil on a Makita blower’s engine
- Set the fan up on a flat, even surface.
- Collect oil by placing a container under the oil drain bolt.
- Remove any dust or debris from the area around the oil drain bolt and oil cap by wiping it clean.
- Take off the drain bolt and gasket so the oil can run freely into the catchbasin.
- Take off the oil filler cap and the oil will circulate more quickly.
- Once the oil has been drained, the drain bolt can be reinstalled.
- If oil got spilt on the fan, clean it up.
- Put fresh oil in the tank until the level reads between the upper and lower markers.
- Put a new oil cap on it.
If the problem persists, take it to a small engine mechanic so they can assess whether or not it can be fixed affordably.
A Makita Leaf Blower with Stale Gas
If you leave fuel in your leaf blower for a long time, it can deteriorate. If you don’t use a lot of gas each month, you should add a fuel stabilizer to it or use it up within 30 days.
The stabilization duration of currently available gasoline additives varies. Its duration can range from 30 days to 2 years.
Just because you put in a fuel stabilizer doesn’t mean it will stay stable for a long time. Use the gasoline additive within the window specified by the manufacturer.
The fuel flow to the engine can be impeded by a sticky residue left behind by old fuel, which draws moisture. Unleaded gasoline with an octane value of 89 or above and no more than 10% (E10) ethanol content should be used at all times.
The smaller engine in your Makita leaf blower is not designed to run on ethanol, so use as little of it as possible.
Using E15, E30, or E85 fuel, which has an ethanol level of 30% or more, will cause damage to the engine and will likely void any applicable manufacturer warranties.
Having submitted warranty claims for carburetor damage to multiple manufacturers, I can say that it is quite unusual to receive coverage for a carburetor when the leaf blower was purchased more than 90 days before.
This is due to the potential harm posed by improper fuel and storage methods. Use of an incompatible fuel or oil is not covered by the guarantee, only manufacturing flaws.
REMEDY: Refuel your leaf blower with fresh gas and discard the old stuff.
- Loose dirt and debris should be wiped away from the area around the fuel tank cover.
- Taking off the gasoline cap.
- Remove used fuel and place it in a safe container.
- Fill up an authorized fuel bottle in preparation for the Makita blower. Blends of gas and oil are used in 2-cycle engines, while 4-cycle engines run on unleaded gasoline alone.
- Put some fuel stabilizer in the tank, such Sea Foam Motor Treatment. To stabilize the gasoline, clean the fuel system, and lower the fuel’s moisture content, do this.
- Replace the lid and give it a good shake to combine the fuel and the additive.
- Add the new fuel to the tank.
- Fix the loose fuel cap.
Broken Makita Leaf Blower Primer Bulb
Inability to fill a cracked primer bulb with fuel means that the leaf blower cannot be started.
The problem can be fixed by installing a new priming bulb.
Makita Leaf Blower Fuel Line Clogged
Gummy deposits formed from storing fuel for an extended period of time in your leaf blower can clog the fuel line and reduce fuel flow. The gasoline line could twist, preventing the engine from receiving the fuel it needs to start.
If the leaf blower’s fuel line is broken, bent, or blocked, you should replace it.
A Leaf Blower with a Blocked Fuel Tank Vent
The gasoline tank has a vent that lets air in. If there is no way for fuel to escape from the tank, the leaf blower will not work.
If your leaf blower only runs for a few minutes before shutting off, you may have an issue with the fuel tank vent if you can’t get it going again unless you unscrew the fuel cap and let air into the tank.
After a few minutes of operation with the gasoline cap in place, it begins to run slowly and eventually shuts off again.
REMEDY: Taking off the gasoline cap to let air into the tank. The fuel cap serves as a vent for the fuel tank.
Makita Leaf Blower with a Filthy Carburetor
The carburetor controls how much gasoline and air are injected into the cylinder for combustion. The carburetor will stop working if you use old fuel because it will gum up and clog.
Clean your carburetor yourself if you’re at all mechanically inclined. Take apart the Makita carburetor and clean it using carburetor cleaner.
It may be necessary to rebuild or replace the carburetor if it fails to function after being cleaned.
Makita Leaf Blower with Faulty Recoil Starter
The recoil action of a Makita leaf blower is what kicks the motor into gear. A malfunctioning pulley, a faulty spring, or damaged clips can prevent your recoil from functioning.
Recoil spring replacement and restringing is one possible solution.
If the clips or the pulley in your recoil are damaged, rendering it inoperable, you are better off replacing the entire recoil system.
Makita Leaf Blower with Defective Spark Arrestor
Your leaf blower is equipped with a spark arrestor, which prevents accidental ignition. A small screen, the spark arrestor is susceptible to being soot-clogged.
The problem can be fixed by removing the spark plug boot. The engine cover and the exhaust cover must be removed. To get rid of the soot, take off the spark arrestor and scrub it with a wire brush.
If the spark arrestor is damaged beyond repair, has a hole, or cannot be cleaned properly, you should get a new one.
Wet Makita Leaf Blower
People who can’t get their leaf blower to start have brought it to my repair shop. It’s usually only a little issue, like a flooded engine.
When the choke is closed and the starter rope is pulled repeatedly, too much gas might enter the carburetor and flood the engine.
It can also occur if the priming bulb is pushed too many times or the starter rope is pulled repeatedly when the switch is off.
SOLUTION: If your leaf blower won’t start because the engine isn’t getting enough air, “unflood” it by following these steps.
Option 1: Turn on Drenched Makita Leaf Blower
- Turn the key to the “run” position.
- To run with the choke open, you must first move the lever.
- Accelerate to full throttle.
- Keep pulling the starter handle until the fan turns on.
Option 2: Fire Up That Soggy Makita Leaf Blower
- Turn off the switch completely.
- The ignition plug must be pulled.
- Grab the starter rope and yank it 6–8 times.
- Replace the spark plug with a fresh, dry one.
- Turn on the fan while keeping the choke fully open.
- To turn on the fan, simply pull the starter handle.