Check These 5 Things If Your Westinghouse Generator Is Leaking Gas
You suspect a gas leak in your generator, but you can’t seem to track it down. Since gas evaporates over time, there may be no visible indicators of a fuel leak to be found other than the pervasive odor of petroleum.
A faulty carburetor bowl gasket, trapped float, or float needle can all cause leaks in the carburetor of a Westinghouse generator. The fuel shut-off valve, the fuel tank, the fuel lines, or the fuel filter could all start leaking.
Use only a well-ventilated space for your job. Always use goggles when handling the gasoline system. Take a few minutes to let the generator cool down.
Before diagnosing, repairing, or operating, be sure you’ve read and understood all of the safety recommendations in the equipment’s operator’s manual.If you are unsure about how to proceed or if you lack the necessary expertise or experience, you should seek the assistance of a professional.
Table of Contents
Westinghouse Generator Gas Leaks Can Occur In These 5 Places
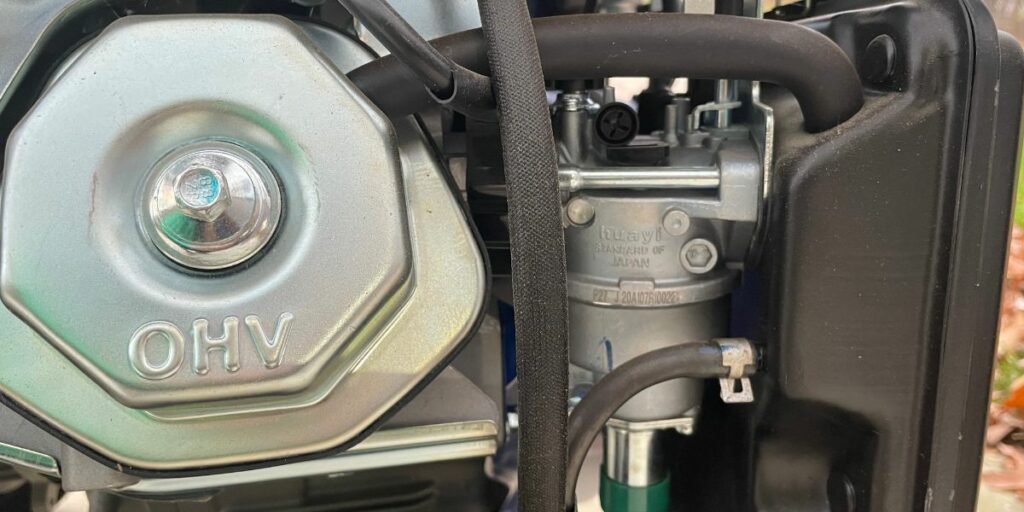
Westinghouse Generator Carburetor
The carburetor is the first area you should check if you suspect a fuel leak. Varnish formed from fuel sitting in the carburetor can cause its small pieces to stick, preventing the carburetor from controlling the amount of fuel entering the engine.
The carburetor bowl gasket can also fail, leading to a leak, in addition to any malfunctioning internal parts.
The Westinghouse generator’s carburetor bowl gasket blew
The area around the carburetor bowl is a good place to start looking for leaks. A thin gasket, resembling a rubber band, is present. Its job is to keep the carb bowl from leaking.
This gasket often gets hard and brittle after some time. The gasket gets hot when the engine is running and cold when it is not because of its proximity to the engine.
The gasket’s sealing ability deteriorated as a result of the repeated stress of heating and chilling. A replacement carburetor bowl gasket should be purchased and installed if a leak is discovered here.
Instructions for Changing the Gasket in the Carburetor Bowl
- If it has a fuel shut-off valve, use it to turn off the fuel supply. The fuel line can also be crimped with pinch pliers to stop the flow.
- Before removing the bowl, wipe the outside of the carburetor to prevent dirt from falling into the unit.
- Gather any leftover fuel from the bowl into a rag or other small receptacle.
- A screw on the bowl’s side may be used to release fuel from the carburetor. If yours does, you should take the screw out, pour the gas into a container, and then put the screw back in. Otherwise, continue on to the next section.
- The bowl of the carburetor can be removed by first removing the screw that secures it.
- Get rid of the old gasket and swap it out for the new one.
- Replace the bowl on the carburetor.
- Replace the screw that was holding the bowl to the carburetor.
- If there was any fuel spillage, clean the carburetor once more.
- Start the engine with the fuel pump running to make sure the carburetor isn’t leaking any more.
Float jammed in the carburetor of a Westinghouse generator.
Locate the air intake port next and check for fuel leaks. If you discover a leak here, it may be due to a trapped float that is preventing the correct amount of gasoline from entering the bowl. When the float in your carburetor gets stuck, fuel keeps pouring into the bowl and eventually spills out.
When you discover a stuck float, you need to disassemble your carburetor to find out why. If the float keeps getting stuck, try cleaning the carburetor.
To get the carburetor functioning properly, you may need to either rebuild it or replace it.
The generator’s Westinghouse carburetor float needle is stuck.
The float needle should be the last part of the carburetor you inspect. The gas flow into the carburetor bowl is maintained by the float needle and float. Needle repairs may be necessary if the needle becomes jammed.
You can either disassemble your carburetor and replace the float yourself, or take it to a small engine specialist.
Westinghouse Generator Gas Leakage Caused by Cracked or Soft Fuel Filter
The plastics used to make the fuel filter can degrade over time if exposed to gas. Make that the plastic inline fuel filter is in good working order if your Westinghouse model requires one.
When the filter gets too old, it can get mushy and start leaking. If your filter has a leak because of a crack or because it is made of flimsy plastic, you should get a new one.
Carefully cut off the ends of the inline filter before disconnecting the gasoline lines. It’s possible for the plastic to soften and crack. Make sure the new filter’s arrow points in the direction fuel is flowing while installing it.
Maintaining a hard fuel filter requires routine replacement. If you use your generator frequently, you should replace it at least once a year.
A Westinghouse Generator’s Empty Fuel Tank
The fuel tank on your Westinghouse generator could be made of metal or HDPE. Both types are equally susceptible to leaking as they get older.
The polyethylene tank may spring a leak if its seams give way. Corrosion and rust patches caused by fuel lying in a metal tank might lead to a hole.
When a fuel tank leak is discovered, a replacement tank should be installed immediately.
However, you might not have this choice if your vehicle has a metal tank and is an older model that is no longer produced. You can try patching up the damage.
The Westinghouse Generator’s Defective Cut-Off Valve
If your Westinghouse generator has a fuel shut-off valve, check there first to see if that’s where the leak is coming from. When a leak is discovered in a shut-off valve, it must be replaced.
A sediment bowl and seal could be installed in the fuel shutoff valve. If there is leaking around the bowl, take it apart, clean it, and reseal it, if possible. In that case, you should replace the whole valve.
Fix the gasoline shutoff valve that has failed.
Westinghouse Generator Fuel Lines
As time passes, fuel lines dry out and crack. Over time, fuel will begin to leak out of the cracks. The fuel lines must be changed if there are any cracks.
Check the hose connection to the fuel components to ensure there is no fuel seepage and that the hose is not leaking.