10 Reasons Your Snowblower is Leaking Gas
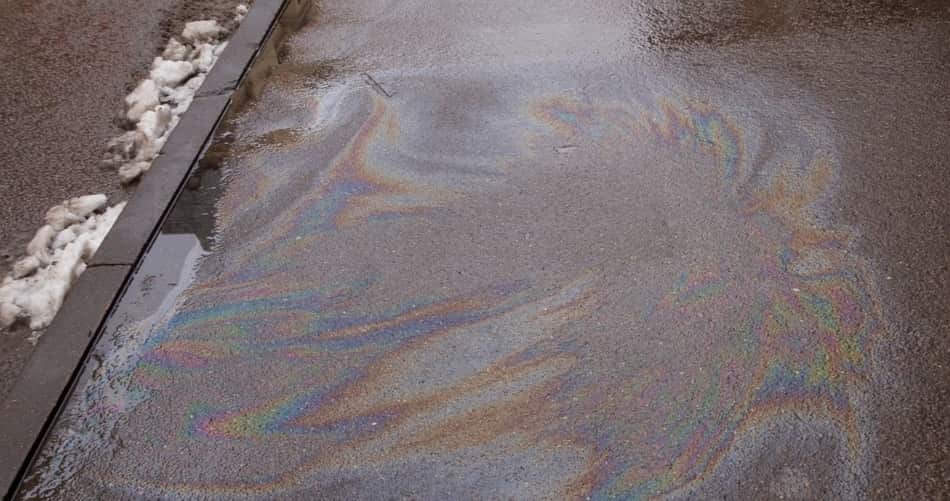
You may be seeing small puddles of gas collect on your garage floor or maybe you just have a strong fuel odor lingering. Either way, it can be frustrating trying to find the cause of the fuel leak.
Your snowblower may be leaking gas because of problems with your carburetor including a stuck float, bad gasket, and stuck float needle. A leak in the fuel lines, a cracked fuel filter, a bad gas tank, and faulty fuel pump, or a bad gas cap can also be the cause of your gas leak.
Identifying your fuel leak and repairing isn’t too difficult of a project on your snowblower. Keep reading for our tips on finding your leak.
This post may include affiliate links. Purchases made through these links may provide a commission for us, at no extra cost to you. As an Amazon Associate, we earn from qualifying purchases.
Follow all safety instructions provided in your equipment operator’s manual prior to diagnosing, repairing, or operating.Consult a professional if you don’t have the skills, or knowledge or are not in the condition to perform the repair safely.
Table of Contents
Reasons Why Your Snowblower Leaks Gas
1. Carburetor Bowl O-Ring
The first thing to look at is your carburetor. This is where fuel is stored after it leaves the fuel tank. It’s the most likely spot to leak first.
When looking at the carb, you will want to first check around the bottom of the carb. This area is called the bowl.
There is a very thin o-ring that goes between the base of the carb and the bowl. This thin o-ring looks like a rubber band. That’s exactly what it looks like if you took out the o-ring and placed it on your workbench in the shop.
It is a very common place to leak because it is very near the heat of the engine. The area heats up while the snowblower is in use and then it cools down when the snowblower is shut off.
The o-ring consistently goes from hot temperatures to cold temperatures. The stress from the heat can cause the o-ring to become hard which causes it to lose its sealing strength.
Replacing the small rubber o-ring at the bottom of the bowl is a very simple process. You will need to get the make, model, and spec number off of the engine and take it to your local dealer to get the correct o-ring gasket for your snowblower.
Once you have the replacement o-ring, shut the fuel off to your snowblower. Unscrew the screw and drop the bowl down.
Replace the o-ring and reinstall the bowl and the screw. Turn the fuel back on and wipe down the carburetor bowl and make sure there are no more leaks.
2. Stuck Float
Take a look at the opening of the carburetor. If you have a fuel leak that is coming from the air intake port, the float could be stuck. The float regulates how much gas is going to be stored inside the bowl. It really turns the gas on and off from the tank.
If the float gets stuck, it won’t shut the gas off and it will allow the fuel to run out of the carb. Now, if this does happen, you will need to tank the carburetor apart to see what is causing the float to be stuck.
You can also bring it to your local engine dealer and have them check it out.
The carb can be cleaned and rebuilt or replaced. Keep reading for instructions to clean your carburetor.
3. Stuck Float Needle
After looking at the float, you need to look at a part in the carburetor called the needle. That’s what really keeps the gas flowing to the bowl along with the help of the float. Sometimes the needle will get stuck.
You can use the handle end of a hammer and gently hit the side of the carburetor to free the needle up. This may work once or twice, but you will need to take the carb apart, find out why the needle is stuck, and then rebuild your carburetor.
4. Cracked Fuel Lines
Follow the fuel lines coming out of the gas tank. The fuel lines must be replaced if you find they are dry-rotted or cracked. Look over the areas where the hose is held with a clamp and check for any damage to the hoses from the clamps.
If the style clamps used are a factory pinch style clamp you may want to replace these with a worm gear style clamp.
5. Deteriorating Fuel Tank
Your fuel tank can be the cause of your fuel leak. If your snowblower is aged and has a steel fuel tank on it, inspect your fuel tank for a small rust hole.
If your snowblower has a plastic tank, check the seams where the plastic is molded together. Over time the seam can separate on a plastic tank or you can develop a hole in a steel tank due to rusting.
6. Leaking Fuel Valve
While looking at your fuel tank, inspect the fuel valve at the bottom of the tank. Some valves are plastic while others are metal. Both styles are prone to leaking.
7. Cracked Fuel Filter
Check out the fuel filter if it hasn’t been removed or replaced in some time. When gas sits in these plastic inline fuel filters for a while, the plastic will begin to break down and become weak and soft.
Don’t be surprised if you go to remove the filter and you crush the ends of the filter because they have become soft or if they appear to be melted. Bad gasoline can cause this to happen after a while.
That is why I recommend using recreational fuel in your snowblower. You can find more information on fuel types for your snowblower in “This is the Type of Gas Snowblowers Use“
8. Fuel Pump Going Bad
Just like the plastic in your fuel filter can break down, the plastic in your fuel pump can also begin to deteriorate due to fuel. Most fuel pumps used in snowblowers are plastic.
When gas sits in a pump for a number of years it can rot from the inside out. The diaphragm will leak and the seams of the pump can begin leaking just like the seams in the fuel tank.
9. Bad Gas Cap
Inspect your gas cap to ensure it is venting and sealing properly. If it is not, when the gas gets sloshing around the tank when you’re out snow-blowing, the gas can leak out of the top of the tank where the cap is secured to the tank.
If you continually smell the gas but never find the source, there’s a good chance it could be your fuel cap. The gas evaporates around the leaking area before you get to see it leaking.
A good thing to do to identify a bad cap is to shake your snowblower to get the fuel to splash around the cap area to see if you develop a wet spot around the cap. If you do see fuel around the cap you will want to replace it with a new gas cap.
10. Weak Primer Bulb
Some snowblowers will have a primer bulb. The primer bulb can leak fuel when the bulb fills with fuel. Other times, you will find a leak where the primer bulb connects to the fuel line or the primer bulb becomes weak and brittle over time.
A Clue Your Snowblower Leaks Gas
Smelling strong gas odors in the area your store your snowblower can indicate a gas leak. Park your snowblower on top of a piece of cardboard overnight.
Check the cardboard for gas spots to help you identify the area of the snowblower leak.
Steps to Clean Your Snowblower Carburetor
1. Spray Carb Cleaner to Minimize Carbon Buildup
Spray some carburetor cleaner in the air intake. Start the engine to see if it will run. If your snowblower fires up and still won’t stay running then we need to get inside the carburetor.
2. Gather Pliers, Screwdriver, Sockets & Ratchets
Get together tools so you don’t destroy parts while taking the carburetor apart.
3. Take a Photo for Reassembly
These days most people have a handy camera on their phones. It’s a very good idea to take a picture of the carburetor so you can refer to it if you don’t remember how to reassemble it after tearing it apart.
You will want to make sure you get a photo showing how the linkage and springs go back on the carburetor.
4. Remove Throttle Cable & Choke Cable
Not every snowblower has a throttle and choke cable. If your snowblower does, remove the cables at this time.
5. Remove Springs
Slowlyremove the springs so you don’t stretch them out too much. You may have to twist the carb a bit to get the springs off. Also, watch the gasket at this point so you don’t tear it.
This is the gasket located between the engine block and the carburetor.
6. Remove Screw Off Float Bowl
The float bowl is where gasoline is stored inside the carburetor. It should have gas in it so have a rag ready to catch the gas. Remove the screw at the bottom of the bowl
7. Remove Bowl
Remove the bowl being careful to not damage the o-ring around it. Caution: Do not get any carb cleaner or any other chemical on the o-ring. It will stretch out and you won’t be able to reuse it.
8. Inspect the Stem for Clogged Holes
Inspect the stem for clogged holes. This stem hangs down from the center of the carburetor and has holes in it. If these holes get plugged from old fuel it will not draw fuel up to the jet.
If the holes are plugged, take a thick wire to clean them out. It’s easier to see what you’re doing if you use a flashlight. Once you get the holes clean you can rinse them with carb cleaner.
9. Inspect the Carburetor
Inspect the carburetor for hard crusty white buildup. This white buildup is fuel additives including ethanol. You need to try to get as much of the white power material out as you can. It’s nearly impossible to get it all out.
10. Reassemble the Carburetor
Reassemble the carburetor now that the carb is clean. Put it back together in the reverse order you took it apart. Remember to refer to the photo you took of the carburetor when reassembling so all parts are reinstalled in the right places.
11. Add Fuel Supply with Fuel Stabilizer
Add a fresh fuel supply that contains and fuel stabilizer before you start your snowblower. Pour the fuel into the tank and give it a chance to fill the bowl of the carburetor.
Start your engine. If you are starting with a pull cord, give the rope a yank. It may not start on the first pull, but it should start after several pulls and continue to run.
I go into more detail about fuel stabilizers and the one I like best in “The Best Fuel Additive for Your Snowblower“.
