How to Service a String Trimmer: Step-By-Step
Performing routine maintenance on your string trimmer is necessary to keep it running at its best. Regularly servicing by regularly changing filters, using fresh fuel, and catching small problems before they develop into significant problems can extend the life of your string trimmer.
The filters and spark plug should be changed annually. They should be changed more often if you are using the string trimmer more than the average homeowner. Regularly check the air filter and spark plug and clean them throughout the season. Inspect your string trimmer for oil or fuel leaks in addition to any damaged parts prior to each use.
Follow all safety instructions found in your operator’s manual before operating or performing any work on your string trimmer. Always wear the proper protection and have all safety guards installed.
Steps to Service a String Trimmer:
- Gather tools and supplies
- Remove the spark plug & follow safety precautions
- Replace old fuel
- Change engine oil (4-cycle engine)
- Replace air filter
- Replace fuel filter
- Check the fuel system
- Replace the spark plug
- Clean the cooling system
- Clean the exterior and trimmer head
- Tighten loose hardware & replace broken or missing parts
This post may include affiliate links. Purchases made through these links may provide a commission for us, at no extra cost to you. As an Amazon Associate, we earn from qualifying purchases.
Follow all safety instructions provided in your equipment operator’s manual prior to diagnosing, repairing, or operating.Consult a professional if you don’t have the skills, or knowledge or are not in the condition to perform the repair safely.
Table of Contents
Perform Maintenance on a String Trimmer: Step-By-Step
Step 1: Gather Tools and Supplies for String Trimmer Maintenance
- Socket set and screwdrivers
- Air filter
- Fuel filter
- Spark plug
- Clean rags
- Engine oil (4-cycle engine model)
- Drain pan or container to collect oil
Step 2: Remove the Spark Plug Wire & Follow All Safety Precautions
Remove the wire (boot) from the spark plug to prevent the string trimmer from starting while you are working on it. Refer to your owner’s manual for all safety guidelines while servicing and operating the string trimmer.
This includes wearing safety gear and using caution when working with your hot engine. Always wait for all moving parts to stop before servicing your equipment.
Step 3: Replace Old Fuel in the String Trimmer
If the fuel has been sitting in the string trimmer for more than 30 days or stabilized fuel has been sitting in the string trimmer for more than 90 days, you should drain the old fuel and refill it with fresh fuel. Using old fuel in your trimmer can cause running problems and damage to the fuel components.
- 2-cycle engine
Use a gas and oil mix. Use unleaded gasoline with a minimum octane rating of 89 and a maximum ethanol content of 10% at the correct fuel-to-oil ratio as recommended by the string trimmer manufacturer. You can find more information on gas and oil mix in, “This is the Type of Gas and Oil String Trimmers Use“. - 4-cycle engine
Use an unleaded gasoline with a minimum octane rating of 89 and a maximum ethanol content of 10%. 4-cycle (4-stroke) engines have a separate fill port for oil and gas. Oil and gas should never be mixed in a 4-cycle engine.
Add a fuel stabilizer like Sea Foam to the fuel to stabilize the fuel and reduce moisture.
Step 4: Change Engine Oil on 4-Cycle Engine String Trimmer Models
If your string trimmer is using a 4-cycle engine, the engine oil should be changed. Warm oil flows better than cold oil when draining the oil tank.
If your oil isn’t warm, reattach the spark plug wire and start the trimmer. Allow it to run for a short amount of time and then shut off.
You want the oil to be warm, but not hot. Hot oil and a hot engine can cause injury and scalding. If your engine and oil are too hot, wait for it to cool down so you can safely complete an oil change. Remove the spark plug wire.
Drain Oil from a String Trimmer with a Drain Plug
Some oil tanks have a drain plug or bolt located at the bottom of the tank to drain the engine oil. If yours has one, follow these directions:
- Clean any dirt and debris around the oil fill cap and drain plug. You do not want dirt to get into the oil tank.
- Get a drain pan or other item to collect oil and place it under the drain plug.
- Remove the drain plug. There may also be a separate gasket, be careful not to lose it in the oil.
- Allow all oil to drain out of the string trimmer and into the drain pan.
- Reinstall the gasket and drain plug once the oil has finished draining.
- Wipe off any oil that dripped onto the string trimmer.
- Place the string trimmer so the engine sits level. Not having the engine level will cause you to not accurately fill the oil to the correct level required.
- Remove the oil fill cap/plug. You may have a gasket that also needs to be removed.
- Fill the with the correct engine oil for your string trimmer. Fill to the fill mark as indicated on the oil tank. If there isn’t a fill mark, you may have to fill it until it reaches the lowest thread on the opening. If you are unsure of the fill level for your trimmer, refer to the operator’s manual. Not enough engine oil or too little engine oil can cause significant damage.
- Never use a 2-cycle oil in your 4-cycle engine. Read “This is the Kind of Oil to Use in a String Trimmer” for more information on the right oil for your string trimmer model.
Drain Oil From a String Trimmer without a Drain Plug
If your string trimmer does not use a drain plug or if it does and you prefer not to use that method, proceed with these steps for draining the engine oil:
- Clean any dirt and debris around the oil fill cap/plug. You do not want dirt to get into the oil tank.
- Get a drain pan or other item to collect oil. Not enough engine oil and too little engine oil can cause significant damage.
- Remove the oil cap/plug. There may also be a gasket that must be removed.
- Tilt the trimmer toward the oil fill hole to allow all oil to drain into the drain pan.
- Once emptied, place the string trimmer so the engine sits level. Not having the engine level will cause you to not accurately fill the oil to the correct level required.
- Fill the with the correct engine oil for your string trimmer. Fill to the fill mark as indicated on the oil tank. If there isn’t a fill mark, you may have to fill it until it reaches the lowest thread on the opening. If you are unsure of the fill level for your trimmer, refer to the operator’s manual. Not enough engine oil or too little engine oil can cause significant damage.
- Never use a 2-cycle oil in your 4-cycle engine. Read This is the Kind of Oil to Use in a String Trimmer for more information on the right oil for your string trimmer model.
- Replace the oil cap/plug. Install the gasket before the cap/plug if one is used on your model.
- Wipe any oil that may have dripped onto the string trimmer.
Step 5: Replace the Air Filter on a String Trimmer
The air filter is a primary maintenance item that protects the engine from dirt and debris. The air filter should be replaced annually during the full maintenance of the trimmer. It should then be cleaned throughout the year.
- Close the choke to keep dirt from falling into the air intake.
- Remove the air filter cover held on by clips, knobs, or screws.
- Remove the air filter being careful not to knock any dirt or debris into the air intake.
- Remove any dirt remaining in the air filter housing and the air filter cover.
- Install a new air filter.
(Some single foam air filters must be coated with filter oil or SAE30 engine oil to help trap dirt. Using oil on some filters will cause them to swell and not perform correctly. Refer to your operator’s manual for care instructions for your type of filter). - Reattach the air filter cover.
Step 6: Replace the Fuel Filter on a String Trimmer
The fuel filter strains the fuel before it enters the fuel system to prevent contamination and clogging from dirt and debris. The fuel filter must be changed out regularly to prevent it from becoming plugged and restricting fuel flow.
- Wipe around the fuel cap to remove dirt.
- Remove the fuel cap.
- Pull the filter out of the fuel tank.
- Holding the fuel line and fuel filter, gently pull the filter out of the fuel line. Don’t allow the ring clip to come off of the fuel line.
- Install a new fuel filter into the fuel line and slide the ring clip over the fuel line and fuel filter tip to secure it.
- Reattach the fuel cap.
Step 7: Check the Fuel System on the String Trimmer
Inspect the fuel tank, fuel lines, and fuel cap. If you find leaks or cracks in the tank or fuel lines, they must be replaced before operating the string trimmer. Check the seal in your fuel cap. You don’t want fuel leaking out of the cap area.
Step 8: Replace the Spark Plug on the String Trimmer
Remove the spark plug and replace it with a spark plug that is gapped correctly. Don’t secure the spark plug wire until all work is completed on the string trimmer.
I like to replace my spark plug during the annual service to keep my string trimmer running at its best. If you choose to clean your spark plug, remove the carbon buildup with a wire brush. A spark plug with a very dark tip, broken porcelain, or burnt electrode must be replaced.
Don’t reconnect the spark plug wire until you are finished servicing the string trimmer.
Step 9: Clean the Cooling System on the String Trimmer
The engine can overheat and shut down when it gets hot due to debris and dirt clogging the air passageways. When the airways become plugged, the air is not able to circulate around the engine to keep it cool.
Confirm the spark plug is removed. Remove the engine cover and remove all debris from the cover and around the engine, including the cooling fins. Remove debris with a bristle brush (not made of metal).
Do not use a metal object to clean the unit as this can damage the string trimmer.
Step 10: Clean the Exterior of the String Trimmer
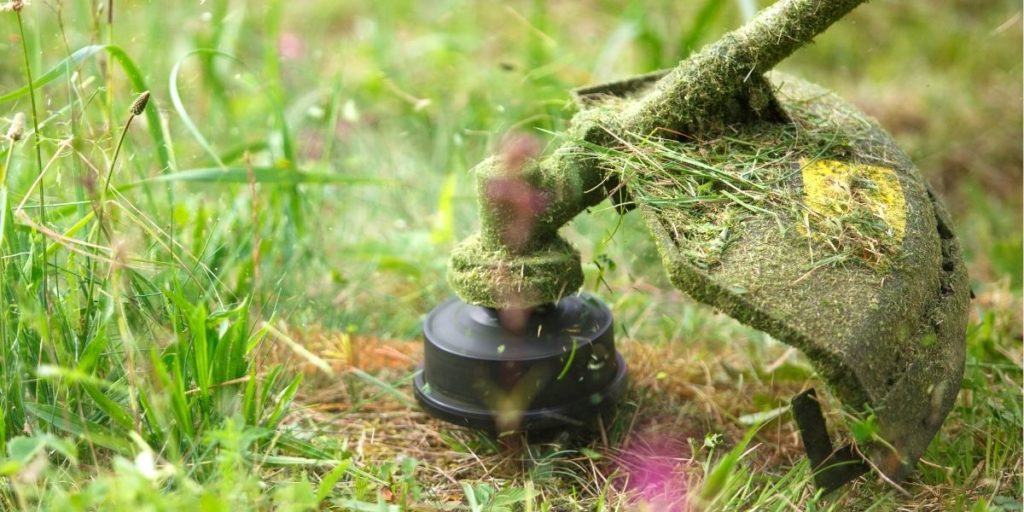
Remove dirt and debris from the exterior of your string trimmer using a clean cloth. Use water with a mild dish detergent to dampen the cloth to remove dirt from around the string trimmer head.
Step 11: Tighten Loose Hardware and Replace Missing or Damaged Parts on the String Trimmer
Inspect your string trimmer for any hardware that may have become loose. Tighten the hardware. Remove any missing or broken pieces on your string trimmer. Make sure the safety guards and shields are in place. Do not operate your string trimmer.
Step 12: Reattach Spark Plug Wire
Once all services are performed on your string trimmer, reattach the spark plug to use the trimmer.
