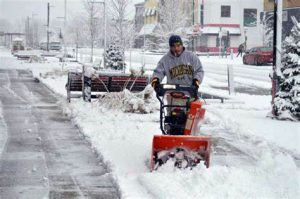
8 Causes of a Snowblower Not Starting After Sitting All Summer
You stored your snow thrower in pristine condition at the end of last winter. As a snowstorm approaches, you find that you are unable to start your snowblower.
The fuel shut-off valve being closed, old fuel clogging the fuel line or gumming the carburetor, water in the fuel tank, a faulty spark plug, or corroded or damaged wiring and connections are all reasons why a snowblower won’t start after sitting.
Before making any repairs to the spark plug, it is imperative that the wire be removed for safety reasons. Always use extreme caution when servicing the auger or chute. Even when the snowblower is turned off, the auger may still be under pressure and move if touched.
Before diagnosing, repairing, or operating, make sure you’ve read and understood all of the safety instructions in the equipment’s operator’s manual. If you lack the knowledge, experience, or physical ability to complete the repair safely, you should seek the advice of a professional.
Table of Contents
A fuel shut-off valve in a snowblower is preventing fuel flow
If your snowblower won’t turn on after the summer, the fuel shut-off valve may be to blame. With this valve, you can cut off the snowblower’s fuel supply.
It’s a common tool for storing or transporting the snow thrower after the season has ended and the fuel supply has been cut off. It’s possible you turned off the gas and forgot to turn it back on in time for the new season.
Outdated Snowblower Fuel
When a snowblower has been sitting in storage for a long time, the gas can become stale and prevent the engine from starting. After only 30 days, gas can start to degrade.
The varnish and sticky deposits it leaves behind can prevent fuel from getting to the engine. This is necessary because stale gas can accumulate in pipes and trigger malfunctions.
It’s important to remove stale gas. Refill the tank with new fuel after adding STA-BIL or Sea Foam. Allow the new fuel to circulate through the snow thrower before turning it on.
If that doesn’t work, move on to the other potential causes of inability to start, such as stale gas.
Contamination of a snowblower’s gas tank with water
Fuel that has been diluted with water may not ignite. Since water is denser than gasoline, it will immediately settle to the bottom of the tank. Due to the inability to form a combustion, the engine will not start if water is present in the fuel.
With a strong enough flashlight, you could potentially make out water at the tank’s base. If you know or suspect that the fuel contains water, you should drain the tank.
Also, make sure the carburetor is empty. (Some gasoline is temporarily stored here after being transferred from the fuel tank.)
Keep your snow thrower in a dry, indoor location to prevent the accumulation of moisture in the future. Fresh fuel should be treated with a fuel stabilizer like STA-BIL or Sea Foam. As a result of using this product, the fuel system experiences less condensation.
Stuck Fuel Line on Snowblower
Gummy deposits left by old fuel can impede the fuel’s ability to move freely through the fuel lines.
Turning off the fuel supply with the fuel shut-off valve or hose pinch pliers will help you determine if there is a blockage in the fuel line.
Then, you should divert the fuel line away from the carburetor and into a storage tank. Start the fuel pump again and keep an eye on the fuel level gauge. Reconnect the fuel line if the flow is satisfactory.
Turn off the fuel and disconnect the fuel line from the snowblower if the flow is inadequate. To clean the carburetor, spray the cleaner down the line. As a result, the obstruction is loosened. After that, try clearing the line by blowing air through it.
Use carburetor cleaner and compressed air sprays repeatedly until the obstruction is gone. If you are unable to have it removed, a new fuel line must be installed.
Remember that snow throwers typically lack a fuel pump. Nonetheless, if your snow thrower has a fuel pump, you should disconnect the fuel line from the inlet port on the pump to inspect fuel flow.
If the flow rate is satisfactory, verify that fuel is being pumped to the carburetor. When the carburetor is mounted above the fuel tank, a fuel pump is essential.
A Snowblower with a Filthy Carburetor
How to clean a snowblower carburetor:
- Reduce carbon buildup by spraying carburetor cleaner. Carb cleaner should be sprayed into the intake. In order to determine whether or not the engine will start, it must first be started.
- A carburetor inspection is in order if your snow thrower starts but then dies.
- Get the right tools together before attempting to disassemble the carburetor, like pliers, screwdrivers, sockets, and ratchets, to avoid breaking any of the components.
- Get a picture so it can be put back together. These days, nearly everyone always carries a camera in their pocket. If you’re going to disassemble the carburetor and can’t remember how to put it back together, it’s a good idea to take a picture of it first.
- Get a picture of the carburetor’s linkage and springs in their correct positions before reassembling it.
- If your snow thrower has a throttle and choke, take them apart now.
- Care must be taken to slowly unhook the springs so as not to overstretch them. To remove the springs, you might have to twist the carb a little. Be careful not to rip the gasket as well. Gasket between the engine block and the carburetor.
- The float bowl’s bottom screw must be removed. The carburetor’s float bowl is where fuel is kept. Make sure you have a rag handy to absorb any gas that may escape.
- Carefully disconnect the bowl from its o-ring. Caution: The o-ring should not come into contact with any chemicals. It will become too stretched out to be of any further use to you.
- Look for blocked holes in the stem. Hole-punctuated and dangling from the carburetor’s center, this stem serves to regulate airflow. If the holes get clogged with stale fuel, the jet will not receive enough to operate.
- Use a thick wire to unclog the holes if necessary. A flashlight will help you see better in the dark. If you use carb cleaner after you’ve cleaned the holes, that’s fine.
- If there’s a white crusty buildup in the carburetor, it needs to be cleaned. Ethanol and other additives in the fuel have left a white residue. You should exert as much effort as possible to extract as much white power content as possible. Getting it all out is extremely difficult.
- At this point, you can reassemble the carburetor.
- Reassemble it in the same order from which you disassembled it. When putting the carburetor back together, make sure to check the photo you took to make sure everything goes back where it belongs.
- Before firing up the snow blower, be sure to add fresh fuel stabilized with new fuel. Put fuel in the tank and let it soak into the carburetor bowl.
- Get the car going. Start by yanking on the rope if you’re using a pulley. While it might not fire up on the first try, giving it a few pulls should get it going, and it should keep running.
Failure of the Snowblower Caused by a Faulty Spark Plug
A snowblower may not start if the spark plug is dirty or broken. Check the spark plug’s condition by removing it.
If the plug has turned a very dark color, is cracked or broken, or has a burnt electrode, it needs to be replaced. If the plug is otherwise functional but dirty, you can clean it with a wire brush without damaging it.
Before installing a new or refurbished spark plug, check to see that the electrode gap is properly adjusted according to the engine manufacturer’s recommendations.
Poor Snowblower Power Source (If your snowblower uses one)
Most electric snow blowers require being plugged into an electrical outlet before they can be used. If you are not getting power from an outlet, check the outlet’s power supply.
There are battery-operated snow blowers available. Make sure there is sufficient charge in the battery by testing it with a voltage meter. Verify that a solid connection has been made between the cables.
If corrosion has built up on the terminals, a solution of baking soda and water can be used to remove it. Recharge the battery with a battery charger if it is low. Getting rid of a dead battery is a must.
It’s important to keep your battery charged up to avoid damaging it. When exposed to extremely low temperatures, a partially depleted battery can freeze.
Wiring or switches on the snow thrower being damaged or corroded
If your snow thrower is not starting, check the plugs and cables connecting it to the power source. Storage of a snowblower while the components and connections are still damp can lead to corrosion.
Additionally, I have witnessed rodent damage to wiring systems caused by prolonged equipment storage. Check for signs of rodent infestation, such as nests and chewed wiring. The faulty wiring must be fixed immediately.
The snow thrower should be kept in a dry place, away from any moisture, to prevent corrosion and future damage. If any moisture is still present on the wiring or components, you can spray WD-40 to get rid of it.
To prevent mice and other rodents from making your snow blower their home, spray it down with Grandpa Gus’ Repellent. The product’s versatility as a spray or in individual packets is a big selling point for me.
After taping the packets to the snow thrower, I squirt the electrical connections.